Your First AgentFlow
This is the "hello world" of Flowera. In about ten minutes you'll build a working chatbot from scratch: a visitor types a message, an AI model reads it, and the bot replies. Along the way you'll learn how the canvas, nodes, and connections fit together — the foundation for every other tutorial.
What you'll build: a friendly assistant that answers questions in a chat box.
Nodes you'll use:
- Start — where the flow begins (set to Chat Input)
- Agent — the "thinking" node powered by an AI model
- Direct Reply — sends the answer back to the visitor
If you've never opened the AgentFlow builder before, skim The canvas first — it explains how to add, move, and connect nodes.
Step 1 — Create a new AgentFlow
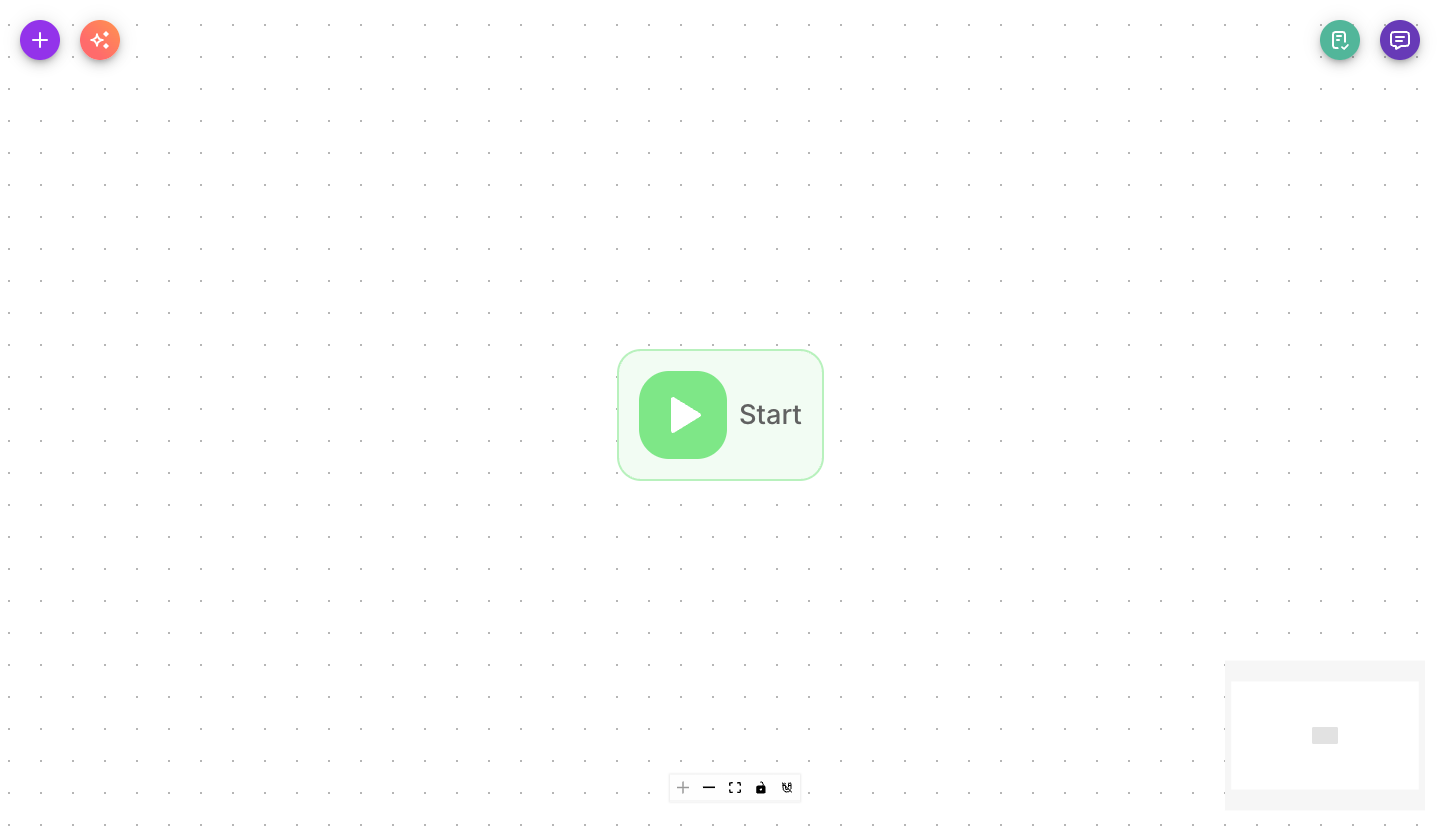
From the AgentFlow list, click Add New. A fresh canvas opens with a single Start node already placed for you. Every flow has exactly one Start node, and you can't delete it.
Give your flow a name (top of the screen) — something like My First Bot — so you can find it later.
Step 2 — Set how the flow begins
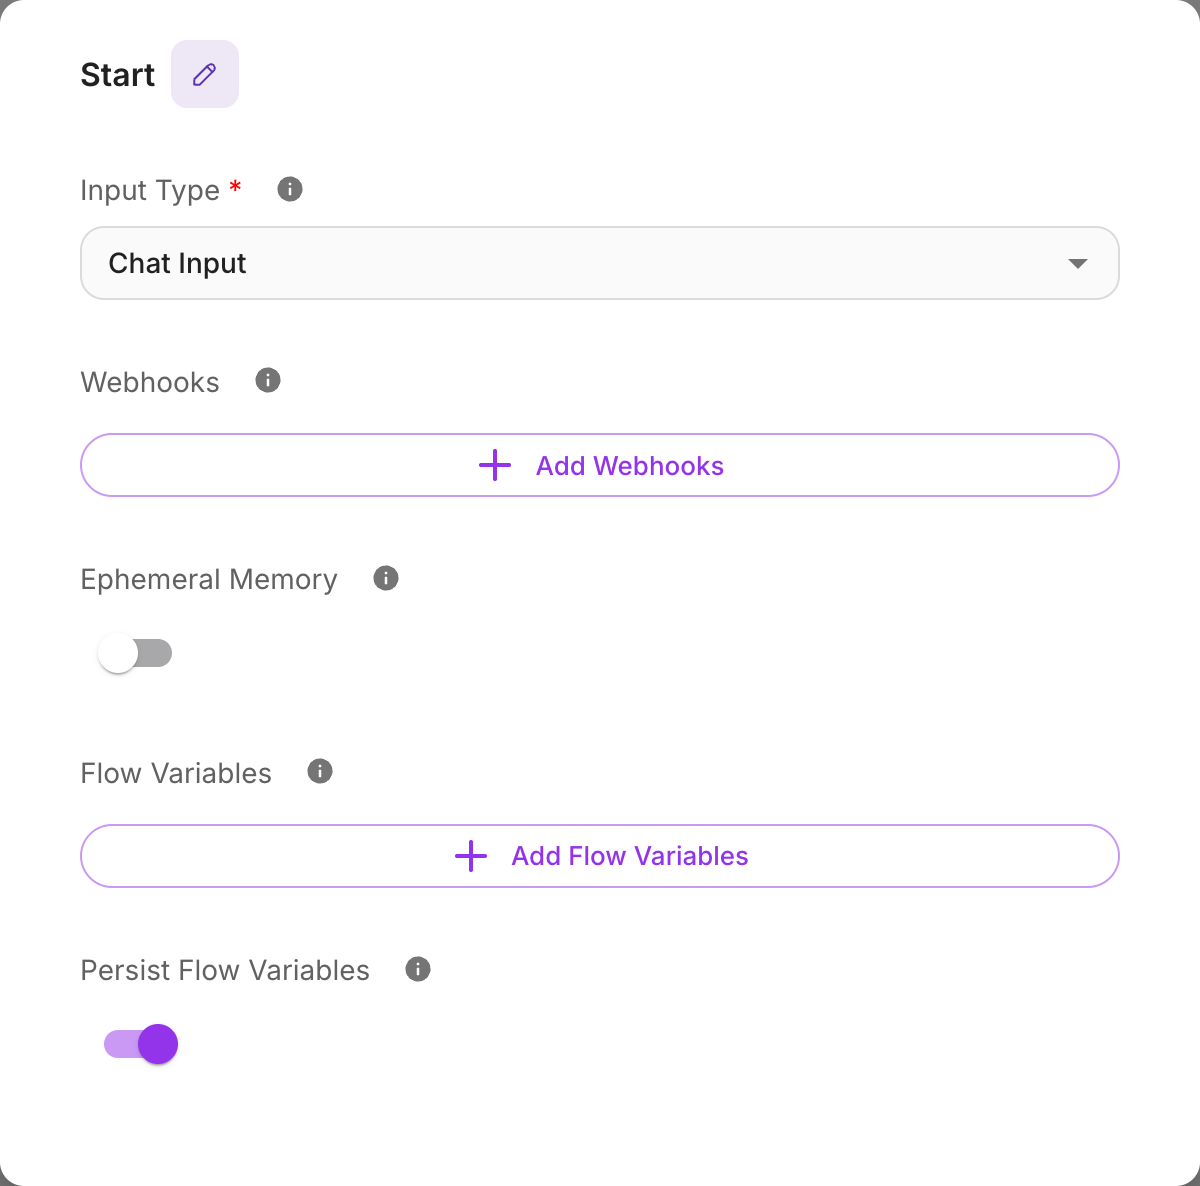
Click the Start node to open its settings. Under Input Type, choose Chat Input. This tells Flowera the conversation begins in a chat box.
Leave everything else at its defaults for now:
- Ephemeral Memory: off — so the bot remembers the conversation.
- Persist Variables: on — the default.
Step 3 — Add the Agent node
Now add the "brain" of your bot. Drag an Agent node onto the canvas from the node palette. The Agent uses an AI model to read the visitor's message and decide what to say.
Open the Agent node and configure two things:
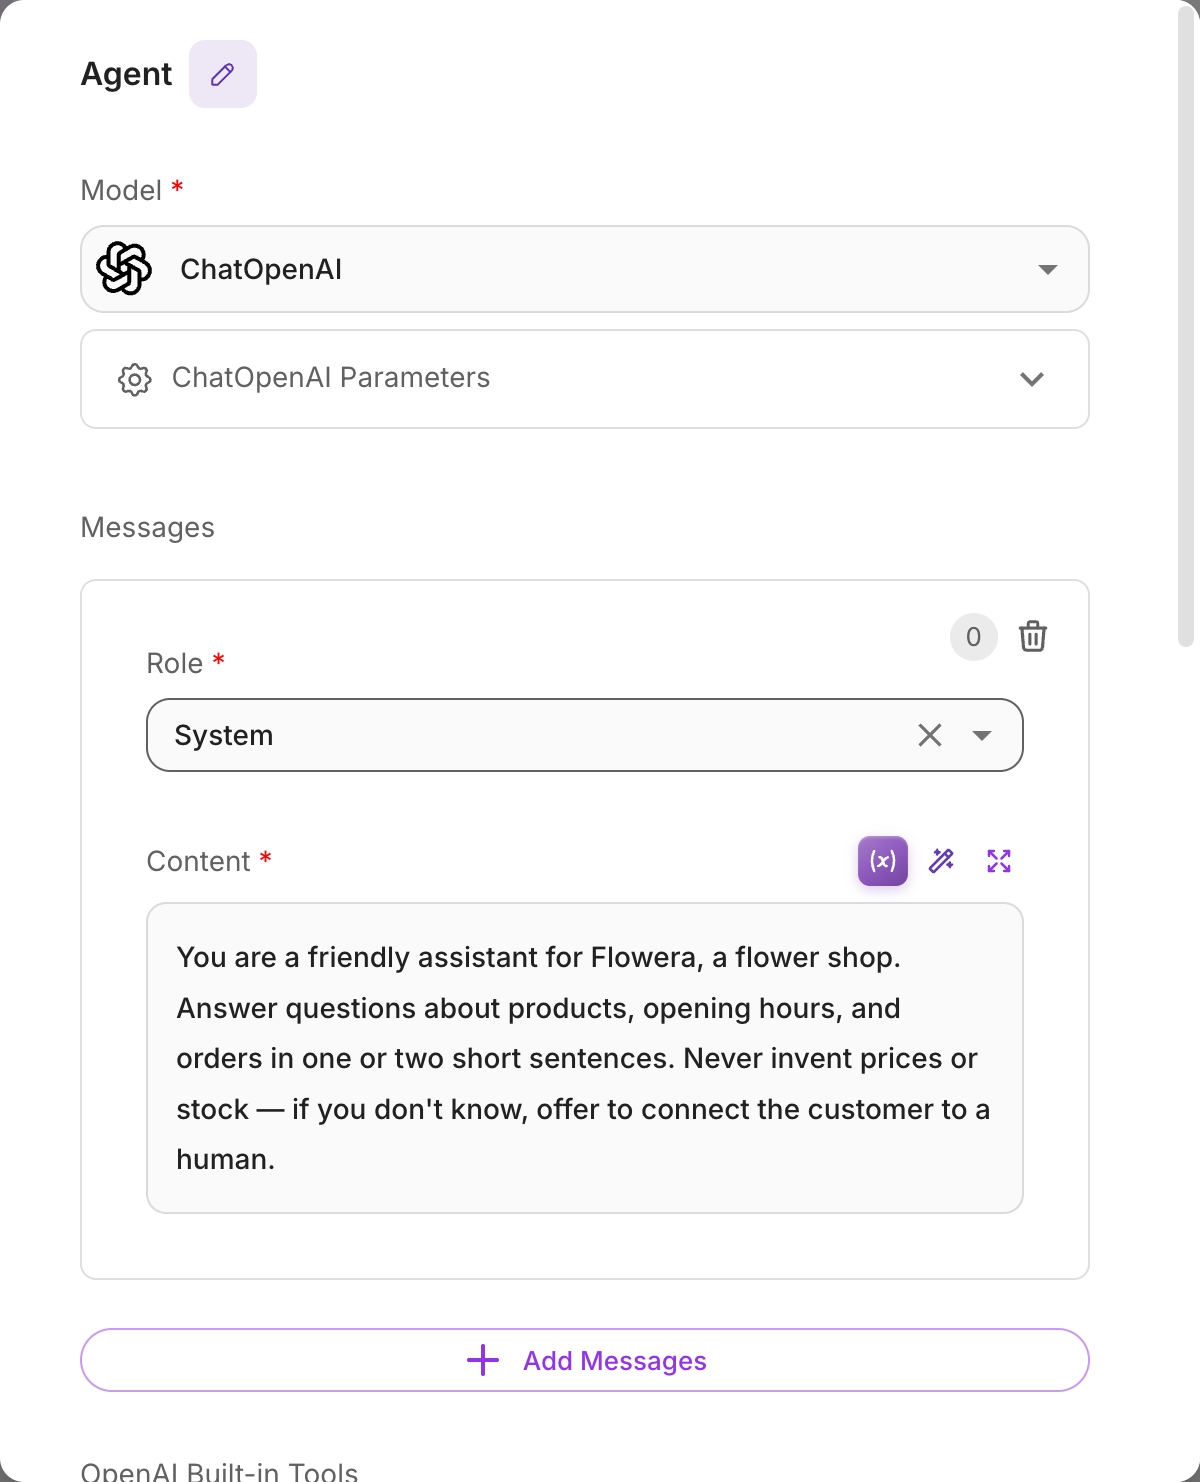
- Model — pick an AI model. If your workspace has a platform default available, you can select any listed model and it just works. Otherwise, choose a model and attach your own credential. See Models for how model selection works.
- Messages — add a System message that describes the bot's job and personality, for example:
You are a warm, concise assistant for Acme Co. Answer customer questions clearly. If you don't know something, say so.
The Agent automatically has access to the visitor's message — you don't need to paste it in.
Step 4 — Connect Start to the Agent
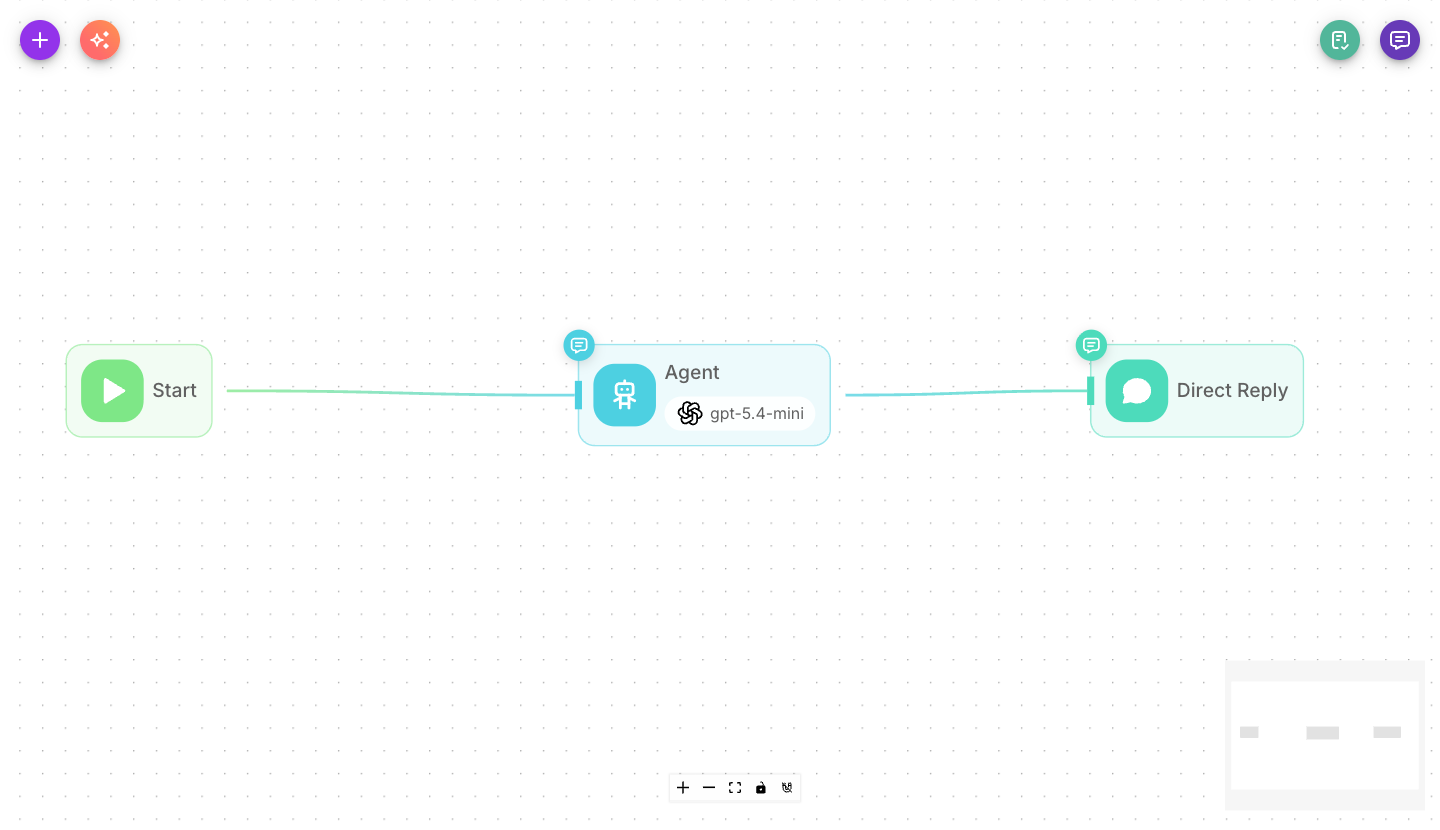
Drag a line from the Start node's output handle to the Agent node's input handle. This connection is what tells Flowera to run the Agent right after the flow begins.
Step 5 — Add a Direct Reply
The Agent thinks, but it doesn't speak on its own. Add a Direct Reply node to send the Agent's answer back to the visitor.
Drag a Direct Reply node onto the canvas and connect the Agent's output to it. In the Direct Reply's Message field, reference the Agent by its node label so the reply carries whatever the Agent produced.
The easiest way is to type {{ in the Message field and pick the Agent from the list that appears — Flowera inserts the correct label for you. The Agent in this flow is called Agent, so you get:
{{ Agent }}
outputThe name between the braces has to match the Agent node's label on the canvas exactly. There is no generic output variable — a Message set to {{ output }} matches no node, so the visitor receives the literal text {{ output }} instead of the answer. If you renamed the node to Support Agent, write {{ Support Agent }}.
{{ }} and $?Anything in double curly braces is a live value pulled in at runtime. Flowera's built-in values are $-prefixed — for example {{$question}} is the visitor's message. A node's output is the exception: you reference it by the node's label with no $, like {{ Agent }}. See Variables for the full list.
Step 6 — Turn off the Agent's chat output
Open the Agent node again, expand Additional Parameters, and switch Show Output in Chat off.
Agent and LLM nodes post their result to the chat on their own, and that setting is on by default. Leave it on while a Direct Reply is also sending the same text and the visitor gets the answer twice — once from the Agent, once from the Direct Reply. With it off, the Agent still hands its output to the Direct Reply; it just stops speaking for itself.
Pick exactly one. Either let the Agent reply directly (no Direct Reply node at all), or silence the Agent and let Direct Reply do the talking. The second is what this tutorial does, because it leaves room to add steps between thinking and replying. See Show Output in Chat.
Step 7 — Test it
Open the built-in chat tester (usually a chat icon on the canvas). Type a question like "What are your opening hours?" and watch the flow run: Start passes the message to the Agent, the Agent thinks, and Direct Reply sends the answer.
Two things to check if it doesn't look right:
- The reply is the literal text
{{ ... }}— the label in the Direct Reply Message doesn't match any node. Clear the field, type{{, and pick the Agent from the list. - The answer arrives twice — the Agent's Show Output in Chat is still on (Step 6).
Also confirm the Agent has a model selected if nothing comes back at all.
Step 8 — Save
Click Save. Your flow is now live on Flowera's chat surfaces. You can embed it, share a link, or keep building.
What you learned
- Every flow starts with a single Start node, and you choose how it's triggered (here, Chat Input).
- An Agent node reads the message and produces an answer using an AI model.
- A Direct Reply node sends that answer back, carrying the Agent's result via the Agent's own label —
{{ Agent }}, not a genericoutput. - Only one node should speak: turning Show Output in Chat off on the Agent stops the answer being sent twice.
- Nodes only run when they're connected — the lines define the order.
Next steps
- Collect information from visitors and save it automatically: Lead collector bot.
- Send the conversation down different paths: Conditional routing.
- Understand exactly what happens on each message: How a flow runs.