Build a Lead Collector Bot
In this tutorial you'll build a bot that has a natural conversation, gathers a visitor's name, email, and phone number, and saves them automatically as a Lead — no spreadsheet, no manual copy-paste. The magic is a naming convention: store those values in flow state under the keys name, email, and phone, and Flowera maps them straight into the Lead's own columns.
What you'll build: a conversational form that captures contact details and files them under View Leads.
Nodes you'll use:
- Start — Chat Input, with Persist Variables on
- Agent — asks for the details and writes them to flow state
- Direct Reply — confirms back to the visitor
Concepts to know:
- Flow state — the flow's shared memory, and how it syncs to Leads
- View Leads — where captured leads appear
How the lead sync works
Whenever a session's flow state changes, Flowera keeps one Lead per conversation up to date. The rule is simple:
- State keys named
name,email, orphone(case-insensitive) map to the Lead's own columns. - Every other key you define lands in the Lead's custom fields.
So the single most important decision in this build is naming your state keys exactly name, email, and phone. Get that right and everything else is automatic.
If you call the key full_name or emailAddress, it won't map to the Lead's name/email columns — it becomes a custom field instead. Use the exact keys name, email, phone.
Step 1 — Seed the flow state
Create a new AgentFlow (see Your first AgentFlow if you need a refresher). Open the Start node and:
- Set Input Type to Chat Input.
- Keep Persist Variables on so captured values survive across messages — the visitor won't give you everything in one line.
- Under Flow Variables, add three keys with empty starting values:
nameemailphone
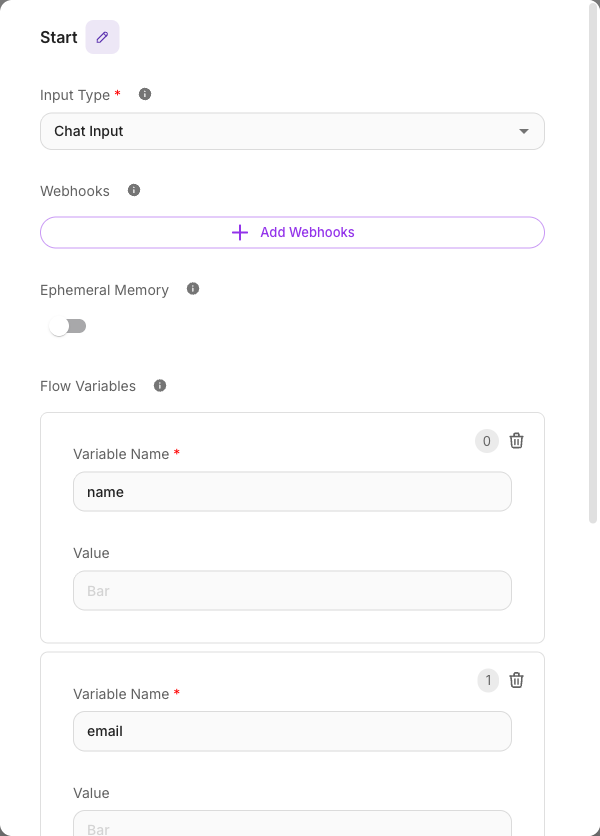
Declaring the keys up front makes them easy to pick from dropdowns when you configure the Agent's state updates, and documents the flow's intent at a glance.
Step 2 — Add the collector Agent
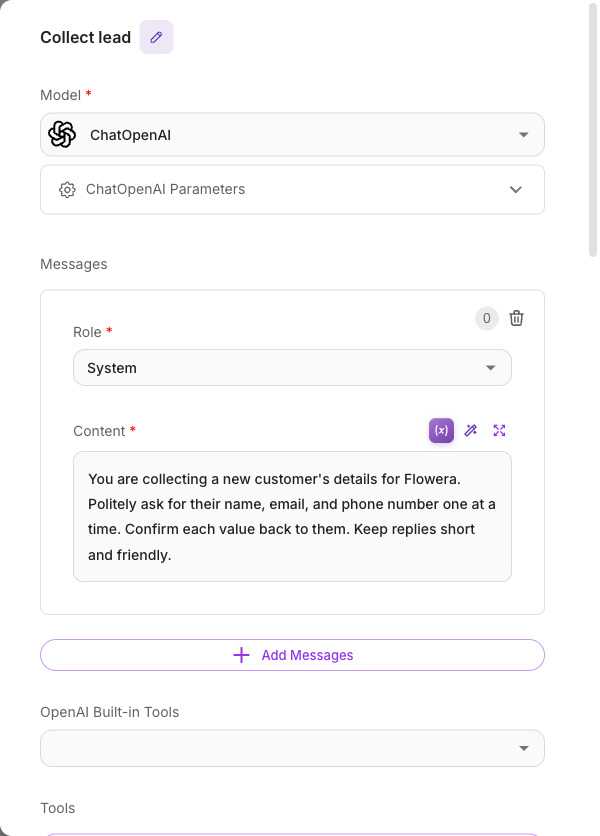
Add an Agent node and connect the Start node to it. Rename it to Collect lead (click the pencil next to its title) so the canvas — and every variable that points at it — reads clearly. In the Agent's Messages, write a System message that gives it a job and a memory of what's already been collected:
You are a friendly assistant collecting contact details so our team can follow up. Ask for the person's name, email, and phone number — one at a time, conversationally. Already collected — name:
{{$flow.state.name}}, email:{{$flow.state.email}}, phone:{{$flow.state.phone}}. Only ask for what's still missing. Once you have all three, thank them warmly.
Because the System message reads the current flow state, the Agent knows what it still needs and won't re-ask for details it already has.
Step 3 — Write captured values into flow state
This is the step that saves the lead. The Agent needs to update flow state as it learns each value. On the Agent node, find its Flow Variables (state updates) section and add three updates:
| Key | Value |
|---|---|
name | the name the visitor gave |
email | the email the visitor gave |
phone | the phone number the visitor gave |
Configure the Agent to fill each value from what it extracted in the conversation. Turn on Block Empty Updates where available so a blank value never overwrites a good one you already captured.
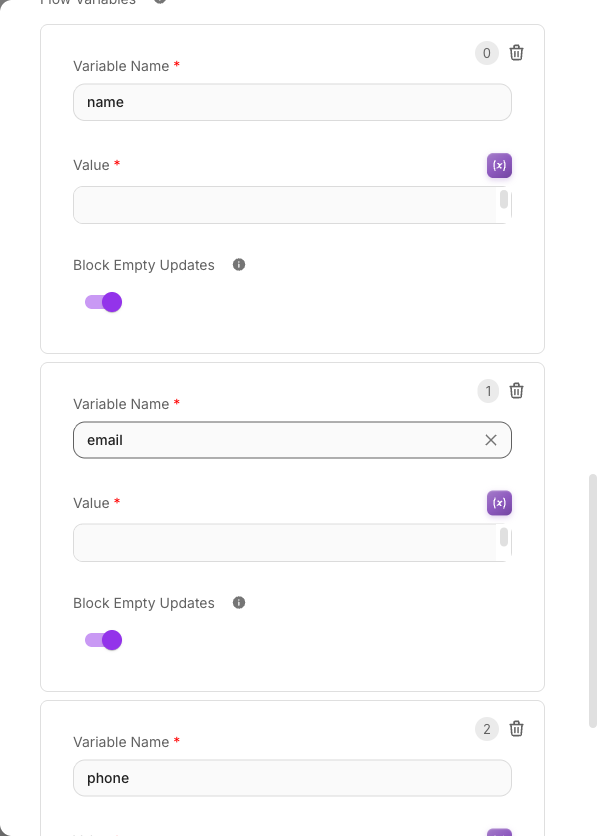
For dependable extraction, have the Agent produce structured output (a small JSON with name, email, phone) and map each field into the matching state key. This is more robust than parsing free text.
Step 4 — Confirm back to the visitor
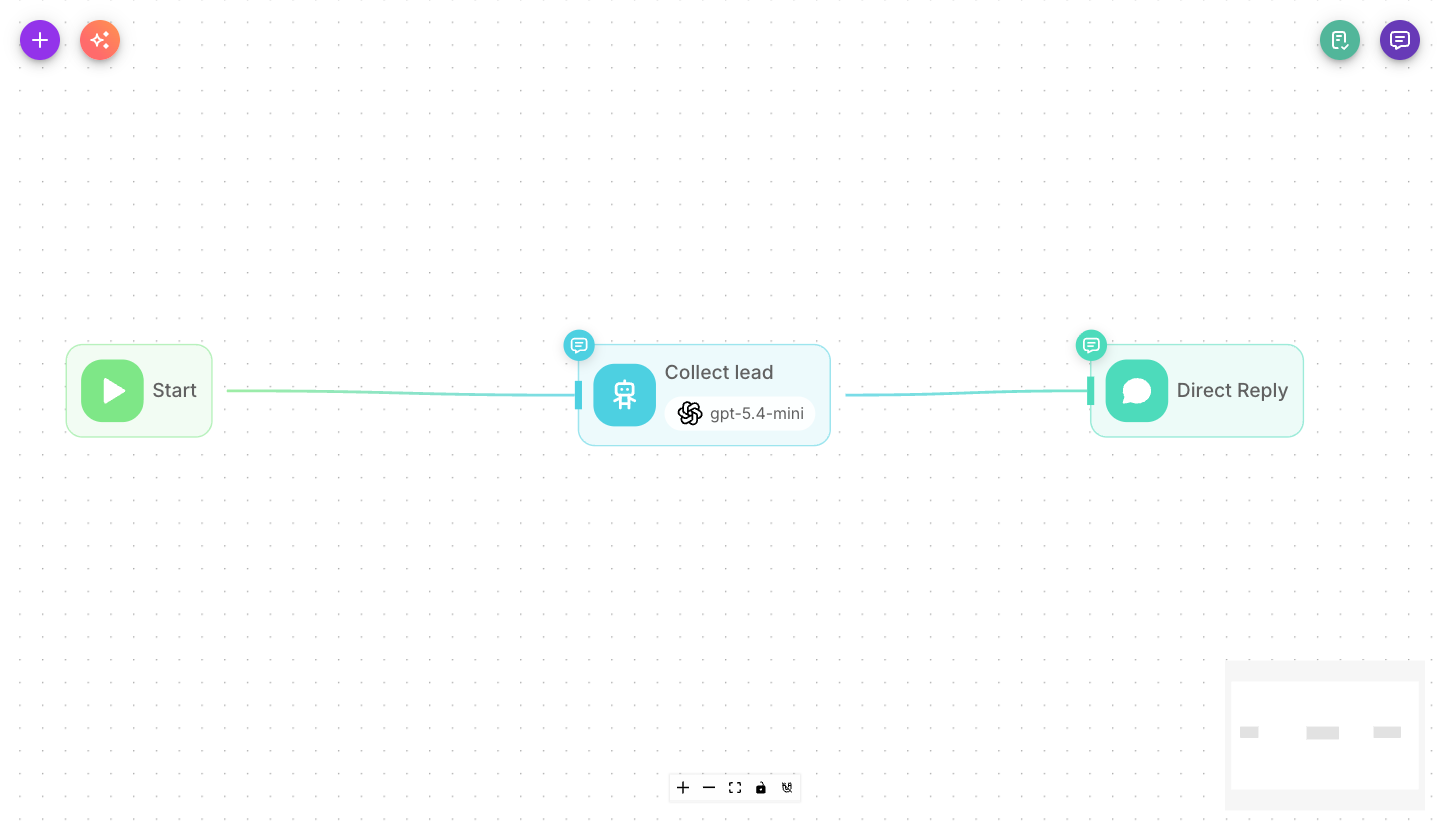
Add a Direct Reply node and connect the Agent to it. Set its Message to the Agent's label so the reply carries what the Agent said. Type {{ and pick the Agent from the list:
{{ Collect lead }}
That's the label from Step 2 — if you named your Agent something else, use that name instead.
Then turn Show Output in Chat off on the Agent, or the visitor gets every reply twice — see Show Output in Chat.
Your graph is now: Start → Collect lead → Direct Reply.
Step 5 — Test the conversation
Open the chat tester and play the visitor:
- "Hi, I'd like a demo." → the bot asks for your name.
- "I'm Dana." →
nameis saved; the bot asks for your email. - "dana@acme.com" →
emailis saved; the bot asks for your phone. - "+1 555 0100" →
phoneis saved; the bot thanks you.
Because Persist Variables is on, each value sticks across turns until all three are captured.
Step 6 — See the lead
Open View Leads. You'll find a single lead for that conversation with Name, Email, and Phone filled in — mapped from your state keys into the Lead's own columns.
Want to capture more than the basics? Add extra state keys — say company or budget. Those aren't reserved column names, so they appear as custom fields on the lead. (A handful of system keys like question, source, and sessionId are never written as custom fields — see Flow state for the full list.)
What you learned
- Flowera keeps one Lead per conversation, updated whenever flow state changes.
- State keys named
name/email/phonemap to the Lead's own columns; everything else becomes a custom field. - Keep Persist Variables on so values captured over several turns aren't lost.
- Have the Agent write to flow state (ideally via structured output) to save what it extracts.
Next steps
- Route qualified vs. unqualified leads differently: Conditional routing.
- Push the lead into your CRM automatically: Calling an external API.
- Understand state deeply: Flow state.