Web Chat and Forms
Web chat is the channel with no setup. There's no account to connect and no platform to get approved by — a flow with the default trigger is already reachable from a chat window the moment you save it.
The node reference lives at Chat input.
Chat input and form input
The Start node's Input Type decides how a visitor gives you their first message:
| Input type | The visitor sees | Best for |
|---|---|---|
| Chat Input | A chat window. They type whatever they want | Assistants, support bots, anything conversational |
| Form Input | A form you define, then the conversation | Anything that needs specific fields before it can start |
Form Input is worth knowing about. Instead of hoping the visitor mentions their order number, you ask for it up front. You define:
- a Form Title and Form Description — what the visitor reads above the fields;
- a list of fields, each with a label and a type: text, number, yes/no, or a dropdown of options you supply.
What they enter lands in flow state under the names you chose, so later nodes can use it directly — no parsing a sentence to find an email address.
Embedding the widget on your site
Open a flow, then the API Endpoint button in the canvas header, and pick the Embed tab.
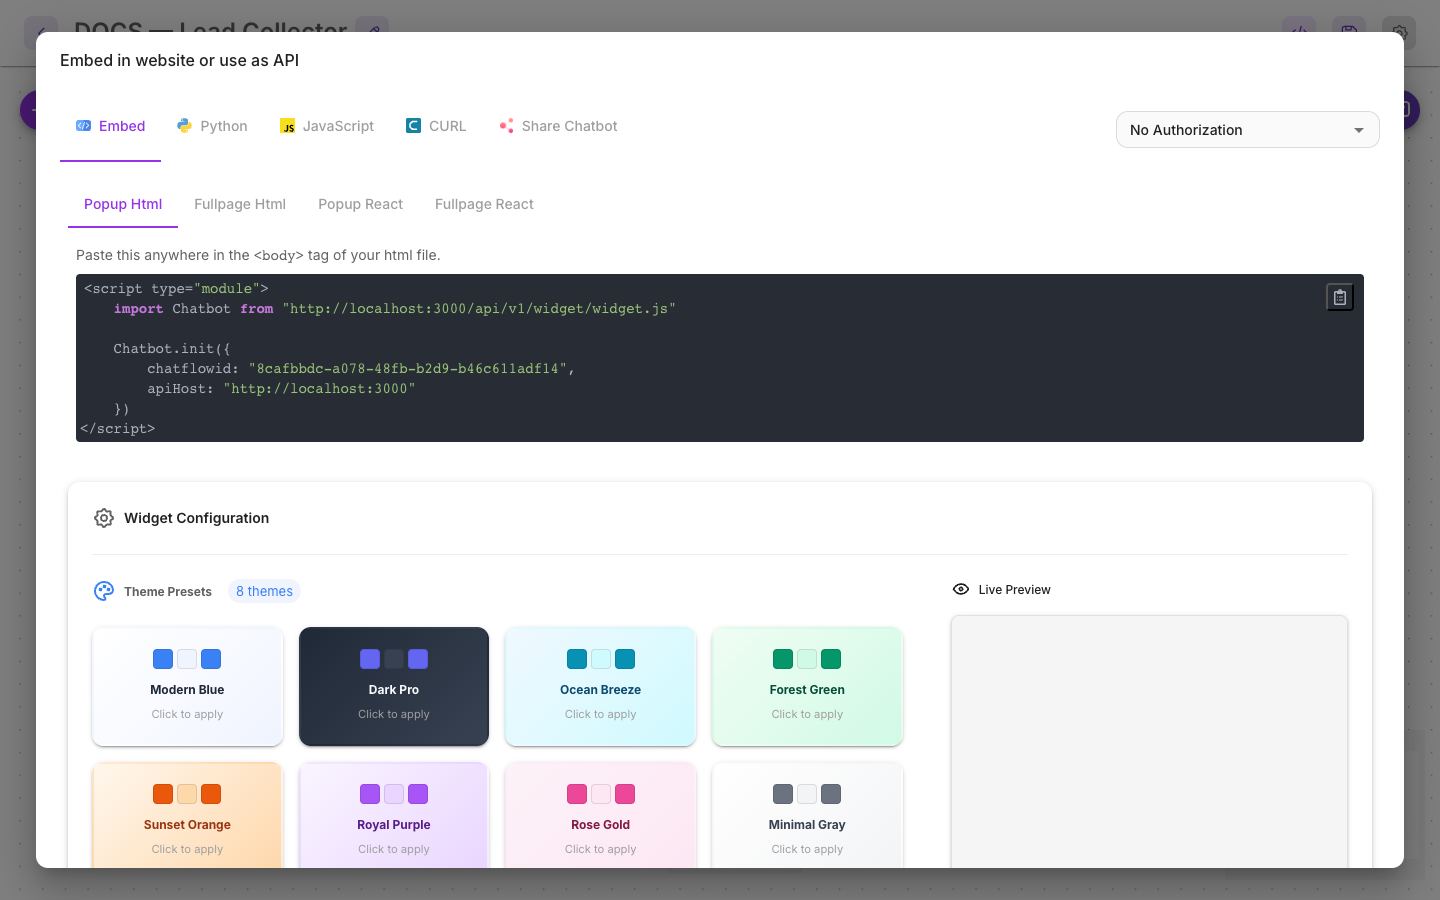
Flowera gives you a short <script> block to paste before your page's closing </body> tag.
Four variants are offered — a floating bubble or a full-page chat, in plain HTML or React — plus
theme presets and a full set of colour, avatar, and welcome-message options.
The details are on Embed the chatbot.
Sharing a link
Sometimes you don't want to touch your website at all. The same dialog's Share Chatbot tab gives the flow its own hosted page at a link you can send to anyone.
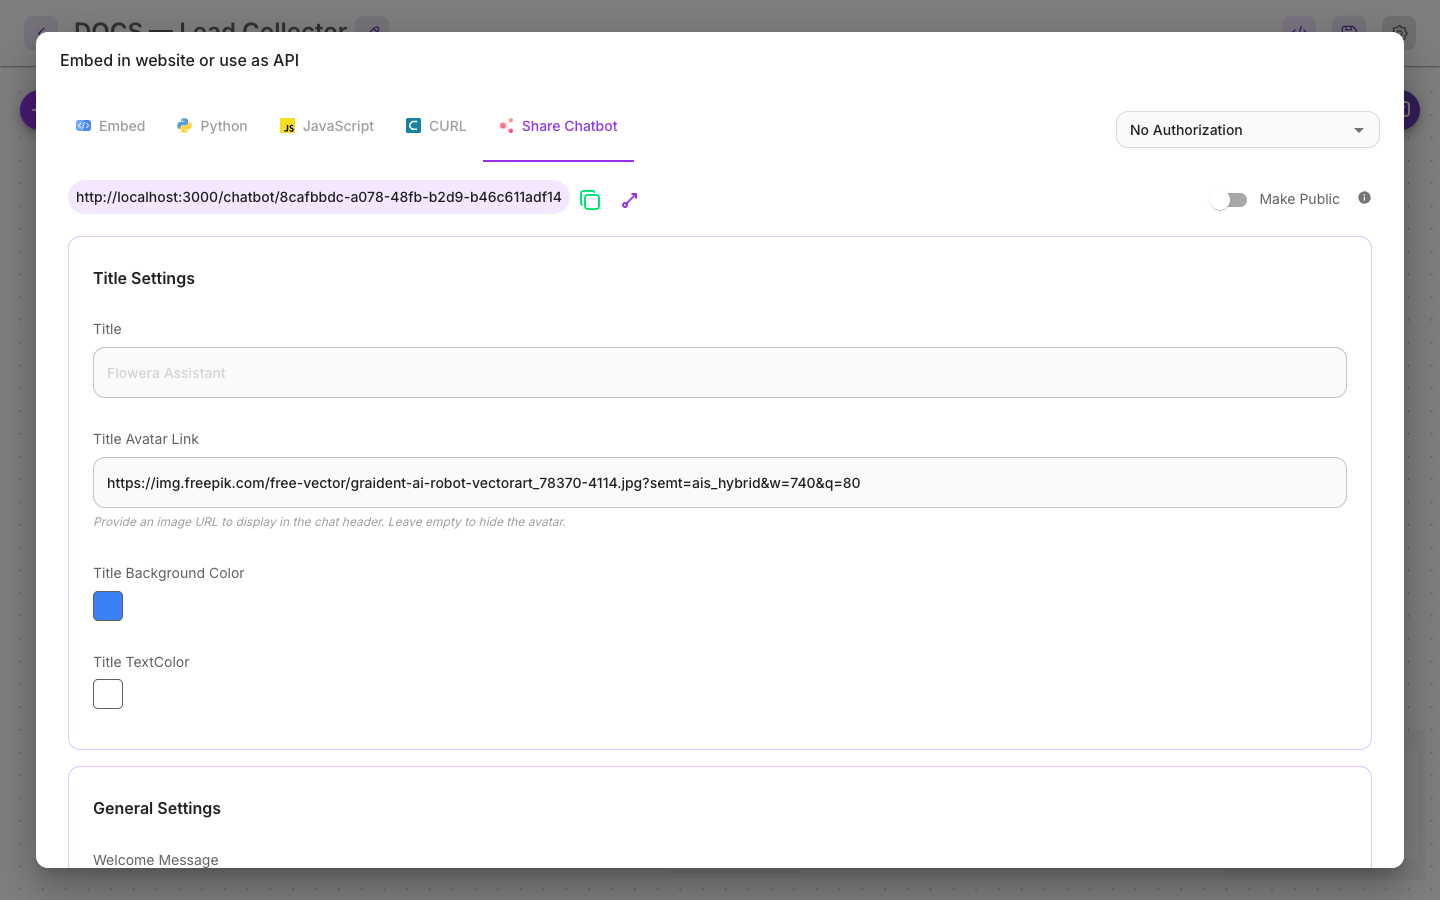
Turn on Make Public to allow access without a Flowera login, then copy the link. It's the fastest way to put a bot in front of a colleague or a customer — no deployment, no embed code.
Details on Share the chatbot.
Recipe: a form that starts a flow
A returns request that arrives complete instead of half-explained:
- Start — Input Type Form Input. Fields: Order number (text), Reason (dropdown: damaged / wrong item / changed mind), Details (text).
- HTTP node — look the order number up in your system.
- Condition — is the order still inside the returns window?
- In window → Agent writes the approval and the next steps → Direct Reply.
- Outside window → Direct Reply explains why, and offers the alternatives you actually support.
Because the fields are structured, step 3 is a simple comparison rather than a language problem.
Limits and gotchas
- Public means public. A shared link with Make Public on can be opened by anyone who has it, and every conversation costs credits. Keep an eye on usage, and turn the toggle off when a demo is over.
- The embed script carries your flow's ID, not a secret key. Treat an embedded bot as something the public can talk to, and don't put anything in its prompt that shouldn't be seen.
- The canvas tester is the same channel. What you see while building is what visitors get — which is why testing there is trustworthy.
- Sessions are per browser. A visitor who returns in a new browser (or a private window) is a new conversation with no memory of the last one.
- Form Input replaces the first message. With a form, there's no free-text
questionuntil the visitor types one — write your first Agent prompt against the form fields instead.
Related
- Chat input trigger — the Start node settings
- Embed the chatbot — widget installation and appearance
- Share the chatbot — the hosted link
- Your first AgentFlow — build one from scratch